Explore our fastener blog for expert tips, uses, answers to common questions, and interesting articles on fastener history and usage. Find the perfect fastener for your project!
So you opted to save a few bucks and bought those “value pack” zinc-plated widgets off the big box store shelf for your latest backyard build. It makes sense—opting for basic zinc or chrome-plated hardware over pricier stainless steel fasteners just for some screws and bolts can seem excessive.
But now, only 6 months later…yikes. Those bargain fasteners are corroding quicker than your New Year’s gym resolution, flaking worse than cheap chrome rims on an old beater car. Your once gorgeous new deck looks sad and unkempt—the low-grade hardware hopelessly surrendering to harsh weathering.
Meanwhile, your smug neighbor’s dock built with premium grade 316 stainless steel hardware still looks ship-shaped. (Jealous glare happens here).
Before you rip it all down in a rage, let’s examine why investing in resilient stainless steel fastening components from the start could have saved your DIY spirit grief…
Built to Withstand the Elements
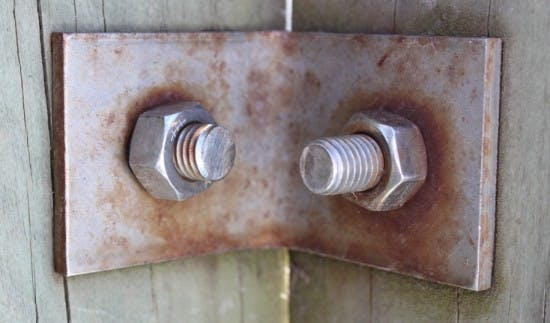
Used within close proximity to the beach, a 304 Stainless steel bracket which has started to rust. The nuts & bolts are 316 Stainless Steel & are withstanding the elements.
Grade 316 stainless steel contains molybdenum for enhanced protection against corrosion including low pH environments. Salt spray testing shows it resists over 1,000 hours of exposure with no issues – 3X+ longer than zinc-coated or chrome fasteners.
Believe it or not, premium grade stainless fasteners often pay for themselves overtime. Considering a minimum 3-5X greater lifespan over zinc or other metals susceptible to corrosion, moisture and UV damage, stainless steel hardware offers excellent reusable value in future projects. Less waste, less replacement buys.
We Offer Optimal Stainless Steel Hardware Grades
Cooler, wet climates prone to rain-induced rust see excellent performance benefits choosing grade 304 stainless over bare metals. Whereas hot, saline coastal areas beat corrosion through grade 316 stainless steel hardware selections containing molybdenum and higher nickel content.
Invest Where it Counts, Choose Stainless Steel Hardware That Lasts
If part of your newly built deck gives out, injuries or worse could result. When safety’s key, “value pack” screws from the hardware store just don’t cut it over years of harsh weather. Upgrading to stainless steel hardware specially-designed to resist rusting and rot gives family sturdy peace of mind.
Your neighbor’s decades-old pergola still looks pristine thanks to its corrosion-resistant stainless steel bolts outlasting cheap chrome fasteners that crumbled quicker than your last diet. Its secret? The removable rustproof stainless fastener touches allowing easy future inspections or part swaps if anything ever starts looking worn again in 20 more years.
For structures where failure threatens disaster, lean on bulletproof stainless steel solutions. We get “better safe than sorry” – your household deserves sturdy, carefree living too. Ask us how to protect what matters most by starting with the right foundations that last.
Stainless for the Future
At the end of the day, stainless steel screws, bolts, and fasteners stand the test of time where cheap hardware rusts. They look great and hold up for decades even with rough weather because stainless doesn’t corrode easily. It costs more upfront to get good stainless pieces compared to stuff from the corner shop. But those cheaper parts break down quicker and need replacing again and again over the years. That can get real expensive, especially if something fails and folks get hurt. Stainless hardware keeps on going strong so you don’t worry about problems down the road. For important stuff expected to last decades without a lot of fuss, stainless steel fits the bill. Let customer service at AlbanyCountyFasteners.com know if you need recommendations choosing durable stainless fasteners on your next project. The extra money tends to be worth it!
You likely don’t spend much time pondering bolts, screws, nuts, and other fastening devices securing objects together in your everyday life, including even the chair you’re sitting on reading this now. But these mundane pieces of hardware are crucial components anchoring the constructed world around us—underscoring why we heavily depend upon humble fasteners including bolts and screws across buildings and devices. Fasteners are the hardware that keep our world in place.
Yet the average person rarely refers to these essential hardware items as “fasteners” in everyday vocabulary. More commonly used terms like nuts, bolts, and screws come to mind first. At our company, AlbanyCountyFasteners.com, however, we proudly carry the “fasteners” namesake because it encapsulates the full scope of our products and highlights their critical role.
Fasteners hardware that keeps our world in place, encompass many components specially engineered to adjoin materials and objects. Technically, they are hardware devices mechanically joining or affixing two or more things. Though often brushed aside as ordinary and forgettable, fasteners exhibit an ingenious blend of simplicity and complexity beneath the surface.
From connecting complex machinery to assembling simple furniture, fastening devices provide vital structure, strength, and support across nearly all domains of construction and technology. The very framework of modern life hinges upon why we depend so greatly on basic fasteners like elemental bolts and screws to securely hold objects together.
So, while “fasteners” may not easily roll off the tongue in everyday vocabulary, we embrace inclusive terminology. It encapsulates the full range of vital screws, bolts, nuts, and other fastening hardware that AlbanyCountyFasteners.com proudly supplies. We’re deeply passionate about connecting construction crews and DIY builders with the affordable fasteners they rely upon but easily take for granted.
Because without the steady supply, immense variety, and engineering innovation underlying these overlooked fastening components, the constructed world around us would fall apart, screw by rivet and bolt.
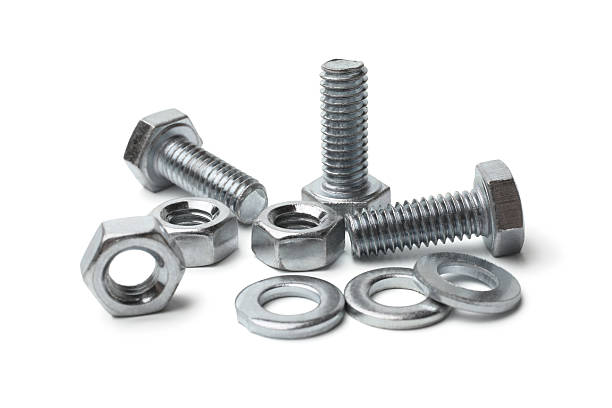
Are you done looking for screws? You’ve likely seen that some of them are made of 100% stainless steel, while others are made of galvanized steel. Because of this, it’s hard to recognize the difference between them. Keeping in view everything, the two of them look and function similarly. So, what’s the contrast between stainless steel and galvanized steel?
These two kinds of screw materials are sold by every home-improvement retailer on the planet. There’s no simple response to this inquiry that which is best since the two kinds of steel have their pros and cons. All things considered, stainless steel and galvanized steel have the equivalent common objective of ensuring against rust and corrosion and they accomplish this objective astoundingly well. Before selecting one for a utility, first, we have to do a deep analysis of both these materials. Their quality, strength, and pricing, hence everything matters.
Stainless Steel
The term stainless steel is utilized to portray steel that has been blended in with at least 10% chromium. The expansion of chromium as a composite assist with securing against rust.
Properties
Stainless steel is shinier and progressively refined looking. While stainless steel isn’t invulnerable to rust, it positively has a more significant level of opposition than 100% steel. This is the reason stainless steel is frequently utilized in open-air conditions where there’s a lot of dampness. The chromium attempts to secure the metal against rust.
Composition
Stainless steel alloys are composed primarily of iron, with varying amounts of carbon, chromium, and other elements such as nickel, molybdenum, and titanium. The composition of these alloys can be adjusted to provide specific properties such as corrosion resistance, strength, and ductility. Threading and cold forming cause stainless bolts to become slightly magnetic, some fasteners will be more magnetic than others depending on size and how quick the cold forming process is. The detailed composition of stainless steel types is listed below;
Grades (by ASTM standard)
Content by weight
Chrome
Nickel
Carbon (max)
Molybdenum (max)
18-8 Stainless Steel
18%
8%
0.08%
0%
305 Stainless Steel
17%-19%
8%-10%
0.12%
0%
316 Stainless Steel
16%-18%
10%-14%
0.08%
2%
410 Stainless Steel
11.5%-13.5%
0%
0.15%
0%
Galvanized, Plated
Galvanized steel, then again, is a sort of steel that has been covered in a layer of zinc. Much like its partner, galvanized steel is additionally made to secure against rust. The zinc goes about as an obstruction of assurance between airborne dampness and the steel, shielding it from rust.
Zinc Plated Steel
Hot Deep Galvanized Steel
Yellow Zinc Plated Heat Hardened Steel
Properties
Galvanization is a procedure that plates steel in a way that shields it from rusting or eroding. This makes galvanized steel incredible for indoor and outside use. It additionally implies that you can support the galvanized tie or metal piece in a way that reaches another metal or material and do so by utilizing a different fastener or screw. It has different coatings;
Composition
Galvanized steel comprises of plunging a completed steel item into a hot shower of zinc. In this procedure, a bond happens, mixing the zinc to the outside of the steel. The zinc plate bonding develops until the external layer is fully composed of zinc. The external layer of this new steel item is harder than the steel to which it is attached to. The steel currently has a defensive layer of plating shielding it from rust. It has different coatings;
Material
Coating Thickness
Temperature Range
Expected
Durability
Suitability
US
Metric
US
Metric
Zinc Plated
Up to 1 mil
Up to 25 μm
-148°F – 392°F
-100°C – 200°C
15+ years
Indoor
&
Outdoor
Hot Dipped
1.7 – 3.4 mils
43-58 μm
-148°F – 392°F
-100°C – 200°C
45-80 years
Indoor
&
Outdoor
Electroplated
0.2 mil
5 μm
-148°F – 392°F
-100°C – 200°C
10+ years
Indoor
&
Outdoor
*mil – a unit length in the US system equal to a thousandth inch or 0.001 inches. *μm – a unit of length in the Metric system equal to one millionth (10-6) of a meter.
Comparison
Strength Analysis
Both galvanized and stainless screws are the absolute best materials for strength and quality. They are particularly valid for metal fixation, that’s why they are commonly known as self-tapping metal screws. Nonetheless, there are some measures you will need to observe while selecting between the two.
Stainless steel screws are made out of a few components, with chromium being the most noteworthy of the added substances and nickel a nearby second. The greatest and most significant point is that the whole of the clasp is stainless. It isn’t only a covering. Its quality and rust insurance are all through. That represents its higher rigidity rating. Companies did pressure tests on latches to mention that, what sort of crazy burden-bearing limit these stainless steel machine screws have. Stainless steel has a tensile PSI quality of 100,000 to 150,000. Hot Dipped galvanized screw has a rigidity of 62,000 PSI since they are grade 2 fasteners.
Material
Tensile Strength
Yield Strength
PSI
MPa
PSI
MPa
Stainless Steel
100000-150000
689-1034
30000-40000
206-275
Galvanized Steel
38000-62000
262-427
21000-31000
144-213
Rusty Nature
The process of galvanization involves the application of a molten zinc coating onto a core of plain steel. While it is rare, the core of the screw may be exposed due to wear and tear over time.
In contrast, stainless steel screws are protected by their inherent chromium composition, which enables the formation of a passivation layer that provides excellent resistance to rust and corrosion. However, if the availability of oxygen is limited, such as in the presence of water, stainless steel screws may still corrode. Although such scenarios are relatively rare, it is essential to consider the potential risk of rusting in any application involving water and stainless steel screws.
Conclusion
Both have their distinct properties acquainted with their utility. Galvanized steel screw is cheaper than stainless steel screw but stainless steel screw is much more durable due to their anti-rust chromium property. This isn’t generally an immediate challenge. Galvanized screws have that solid, dull, mechanical look, while stainless steel is shinier and more refined looking. Thus, galvanized wins with regards to its cheap price, stainless steel with regards to quality, and rust insurance.
Without drywall anchors, our homes and businesses would look quite peculiar and drab without the many frames, décor, and other items that adorn their walls. Though the introduction of drywall has led to reduced material and labor costs and lower home prices, drywalls alone are not good at supporting the weights of objects that are mounted to them. This is because nails or screws driven through drywall can easily slip out with just a few pounds of weight. While lighter objects such as calendars and small décor can be successfully mounted to drywalls with nails or screws, what about larger objects?
Drywall anchors – special fastening devices that allow items to be mounted to walls without the need for studs – are the answer and were introduced to safely and secure heavy items to drywalls. In this article, we dive deep into what exactly drywall anchors are and how they work and discuss vital information regarding the different loads on both drywall and drywall anchors.
How do Drywall Anchors Work?
Different types of drywall anchors have different methods of securing into drywall. However, all drywall anchors work by gripping the drywall one way or another. By doing so, anchors can counteract the weight of a hung object safely. First, a pilot hole with a diameter that is recommended by the drywall anchor manufacturer is drilled into the drywall at the desired location. Then, drywall anchors are placed into or through the pilot holes. Once placed, screws can work with the anchor to create a secure connection, whether that is through the expansion of the anchor within the wall or by forming a clamping force between the anchor and the installed object.
Rule #1: Always Look for a Stud
When mounting heavy objects, it is always preferable to screw at least 1” into a stud. If you can find at least one stud to use for mounting an object, you can be assured that you have a secure, reliable connection.
If you’re mounting something heavy and can’t find a stud, think about using a wood backing behind the drywall or adding a simple wooden mount that connects between two studs. All of the above do not require a drywall anchor.
Although drywall anchors are a convenient solution, using drywall anchors can be dangerous and cause serious injury if not used or installed correctly. It’s important not to surpass the recommended weights for drywall anchors when mounting objects. If you ever have doubts or reservations that a particular drywall anchor can support a specific weight, then consult with a professional. This article is presented for informational purposes only, and should not be used to exceed manufacturer recommendations.
Important Load Considerations When Using Drywall Anchors
While it can be easy to install drywall anchors, hang objects, and call the job done, it’s important to have an understanding of the different loads that act on an anchor when an object is mounted. By doing so, you can be more aware of the potential pitfalls of using drywall anchors and ensure safe usage every time.
When objects are mounted onto a drywall anchor/screw assembly, two main forces are developed: tensile and shear forces. Tensile forces are forces that act parallel to the shank of the screw and cause the screw and anchor to be pulled from the wall. Shear forces are forces that act perpendicular to the shank of the anchor and pull downwards. For objects mounted flat onto walls via a drywall anchor, the weight of the object is the shear force. If you mounted a hanging plant on a straight hook, there will be a tension force trying to pull it out of the wall. When evaluating the loads on an anchor, assess each force by itself.
While this discussion only considers simple loading, load analyses for drywall anchors can quickly become complicated with distributed loads or loads applied at noticeable distances from the wall. Listed below are two key considerations when using drywall anchors:
1. Shear Forces
Shear forces are normally accounted for by the weight of an object. If an object is too heavy, it may dig into the drywall and enlarge the bottom opening of the hole. Depending on the type of anchor, this may create a situation where you find the anchor easily slips out of the wall. If you’re using a wall anchor that relies on a tight fit within the hole you drilled, you just lost much of your holding power. Typically advertised weight ratings will incorporate a safety factor, but even so, it is always best to work below the rating. This helps account for imperfect installations and unexpected, variable loads that may be placed on the object you’re mounting.
Consider using multiple drywall anchors to evenly distribute heavy loads amongst them so long as the partitioned load is still lower than the manufacturer’s recommendation. Be mindful of the placement of drywall anchors as placing them too close to each other or using an excessive amount of drywall anchors can actually compromise the strength of the drywall. Although you may come across data that shows ultimate load capacities for your anchor type, without perfect knowledge of testing conditions and your own materials you’re working with, don’t assume they are directly applicable to your installation.
2. Cantilevers and Tension
A cantilever is a structure, typically a beam, that is fixed and supported on one end while a load is applied on the opposite, free end. When an object is mounted at a distance from the wall, the drywall anchor/screw assembly effectively functions as a cantilever. Hence, torque is developed on the fixed end of the anchor that can pull the anchor out of the wall if loads are too high.
The weight distribution of a hung object can have a big impact on the forces experienced by the anchor. A common use for drywall anchors is to hang floating shelves or plant hanger hooks. These usually have items placed along the same axis as the anchor. For shelves, all you need is for one of a pair of anchors to be improperly installed for undue stress to be placed on one side of the mount. Therefore, the entire assembly can act as a cantilever. Objects placed on the end of the shelf or hook can create a “crowbar effect” in the drywall anchor which could rip the anchor out of the wall.
If you’re mounting a shelf with minimal bracket support, distributing the load will reduce the tension placed on the drywall anchor.
It’s recommended to distribute weights evenly between the wall and the edge of a floating shelf to prevent this effect. This is because distributing the load actually produces less torque at the wall which can be proven through an engineering static analysis. Consider using L-shaped brackets with drywall anchors to help bear some of the load and prevent the crowbar effect, too.
Will the Drywall Anchor or Drywall Fail First?
Drywall anchors have a max load that they can experience before failure. But what about the drywall?
According to the Gypsum Association, the flexural strength of various drywall types and thicknesses was found to be between 50-100 lbf, depending on the type and thickness of the drywall. Drywall samples were tested in accordance with ASTM C473. In this test, a horizontal piece of drywall is fixed while a testing apparatus pushes down on the center of the drywall to make it flex and eventually break. Additionally, the nail pull-out resistance in drywall was found to be anywhere between 40-100 lbf, depending on the thickness of the drywall.
If you’ve ever taken a close look at the test data for a particular type of drywall, you may notice that the flexural strength varies depending on whether it is installed parallel (vertically) or perpendicular (horizontally) to the framing. When you take into account that you could be dealing with 16” or 24” stud spacing, you may find that drywall can be much stronger (or even much weaker) than you might expect.
Drywall anchors and the holes with which they are mounted are small relative to the size of an entire drywall panel. Because shear forces and moments created by drywall anchors are localized, the drywall should not fail so long as drywall anchors are installed properly and not too close to each other. It’s more likely you may have to contend with some localized crumbling due to variable forces placed on a particular anchor.
Final Thoughts
Drywall anchors are exceptionally useful fastening devices if they are used with an acknowledgement of their limitations. Our offerings include self-drilling anchors in diecast zinc or Nylon and toggle bolt assemblies. For more information check our latest guide How to Choose a Drywall Anchor to see which drywall anchor is right for your project.
Drywall anchors make for easy installation of paintings, pictures, shelves, and much more. Unlike drywall screws or nails, drywall anchors don’t require a stud behind the drywall panel. This allows you to securely install them without damaging drywall, which is a soft material.
Before we jump into drywall anchors, let’s take a look at drywall itself. Sheetrock, drywall, and gypsum are popular terms used to refer to the same thing – drywall panels.
Sheetrock is actually a brand of drywall, but it’s a term typically used in a generic way (known as a proprietary eponym or generic trademark). Gypsum is the material you find in drywall panels. It’s a soft sulfate mineral. When referring to drywall, each term has its place. Remember that gypsum is a component of drywall panels and Sheetrock is a brand of drywall. Many contractors use these terms interchangeably.
Drywall is a popular material for building homes, offices, and more. It allows for the effective creation of flat walls. It’s usually fastened to wood studs with drywall screws or nails. As mentioned before, drywall anchors are ideal in situations where there isn’t a stud in the location. Drywall anchors help secure any number of items, including picture frames.
Types of Drywall Anchors
Drywall anchors are extremely handy. But which drywall anchor should you choose? Here are different types of drywall anchors (and their respective applications).
Self Drilling Drywall Anchors
Want to secure something 10 to 25 pounds in weight? Self-drilling drywall anchors are great for light-weight applications. These anchors typically come in two options: self-drilling plastic drywall anchors and self-drilling metal drywall anchors.
As a type of snap toggle anchor or toggle bolt, the KapToggle drywall anchor is ideal for securing fixtures to drywall (as well as masonry). This anchor is three times stronger than typical wall fasteners. It is made of a combination of nylon and zinc-plated steel.
Expansion Anchor
A Sammy Sammy Rod Hanger Drywall vertical anchor (aka Toggle Bolt) is ideal for heavier items like ceiling fans, shelving, and cabinets. For example, a ½” Sammy Bolt can safely hold approximately 100 pounds. Note: we recommend the use of Sammy Nut Drivers with the installation of Sammy Screws.
Zinc Plated Toggle Wing Anchors
Great for hollow wall applications (meaning there’s space on the other side of the drywall), Zinc Plated Toggle Wing Anchors are usually used as replacements for spring wings in toggle anchor installations.
Plastic Toggle Anchors
Need to hang drapery rods, towel bars, soap dishes, and the like? Plastic toggle anchors are the go-to option when it comes to drywall applications. One benefit is that the single-piece anchors stay in place, even after the screw has been removed from it.
How to Install Drywall Anchors
There can be slight varieties to these steps depending on the type of anchor. Here are the basic steps to install a drywall anchor:
Use a measuring tape and pencil to mark the location of the drywall anchor.
Make what’s called a pilot hole with a drill with the proper size drill bit.
Place drywall anchor into hole and tap into place with a hammer.
Make sure anchor heads are flush to the drywall surface.
Install screw with a screwdriver.
How to Remove Drywall Anchors
Need to remove a drywall anchor? Whether relocating shelves or prepping a clean wall surface, it pays to know how to properly deal with anchors (and patch the drywall surface). Below, you’ll find four ways to remove anchor screws.
Before you start, you’ll need some common tools. Here’s a list:
Needle-nose pliers
Hammer
Utility knife
Drill (and cutting wheel)
Screwdriver
Nails
Protective eyewear
Drywall compound
Drywall knife or spatula
Sandpaper
Microfiber cloth or rag
Method 1: Pull Out Anchor
This method is pretty intuitive. With the help of needle-nose pliers, you can oftentimes safely pull out an anchor. Use a back-and-forth motion to gently wiggle the anchor out of place. If for some reason this doesn’t work, don’t force it. Check out the other methods.
Method 2: Back Out Anchor
This approach requires a screwdriver. Use one that fits snugly into the anchor. With a counter-clockwise motion, turn the screwdriver until the anchor comes out of the drywall. If this doesn’t do the trick, move on to Method 3.
Method 3: Cut and Hammer Anchor
Make sure to use protective eyewear. Using a drill with a one-inch cutting wheel, carefully cut off the anchor head. Next, tap a wide nail with a hammer on the mouth of the anchor. This should cause it to sink behind drywall. Be careful while using a cutting wheel.
Method 4: Recess Drywall Anchor
Sometimes the best approach is to recess the anchor instead of removing it. Begin by scoring the drywall surface with a utility knife. Then, take a screwdriver wider than the head of the anchor. Tap lightly with a hammer until it’s sunk down enough. Finally, patch it.
How to Patch Drywall Anchor Holes
Removing a drywall anchor is the first step. Next, it’s time to smooth it all out. How do you fill drywall anchor holes? Follow these three steps for a clean repair.
First, grab a hammer. Tap gently around the edges of the anchor hole. Once the edges are flush with the surrounding surface, wipe down with a microfiber cloth or clean rag.
Using an “X” pattern, fill the hole with drywall putty. You can use either a drywall spatula or knife. Remove excess compound and make flush with the wall. Let it dry overnight.
Last but not least, use medium-grit sandpaper to smooth out the surface. Wipe down with a rag or microfiber cloth. Then, you can apply touchup paint.
Final Thoughts
Drywall anchors are a fantastic way to ensure your home fixtures and other items are properly secured to walls and ceilings. From art to towel racks to cabinets, these anchors provide easy application and peace of mind.

.jpg%20)


 Without drywall anchors, our homes and businesses would look quite peculiar and drab without the many frames, décor, and other items that adorn their walls. Though the introduction of drywall has led to reduced material and labor costs and lower home prices, drywalls alone are not good at supporting the weights of objects that are mounted to them. This is because nails or screws driven through drywall can easily slip out with just a few pounds of weight. While lighter objects such as calendars and small décor can be successfully mounted to drywalls with nails or screws, what about larger objects?
 According to the


