DIY Projects & Crafts with Fasteners
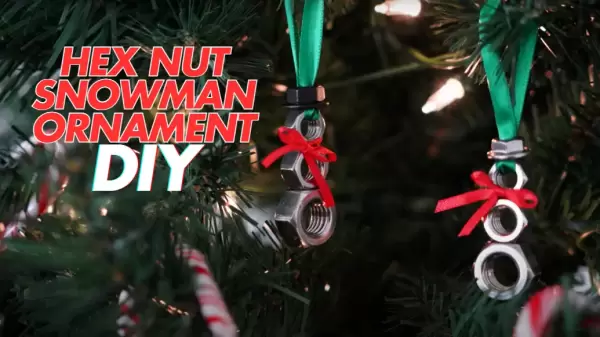
Hex Nut Snowman Ornament
Watch How It's Made
Printable Instructions
Download PDF
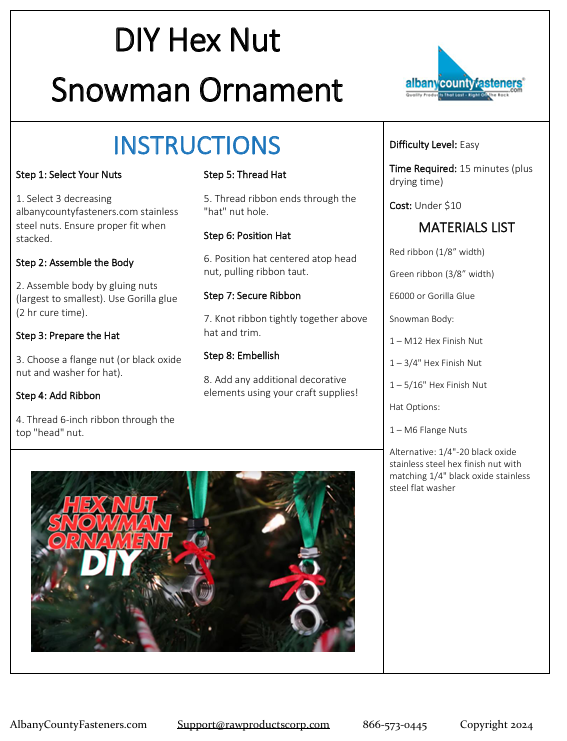
DIY Hex Nut Snowman Ornament
Safety First!
- Adult supervision required for glue application
- Keep small parts away from children under 3
- Work in a well-ventilated area when using strong adhesives
- Wear gloves when handling adhesives
Materials Needed
Snowman Body Nuts:
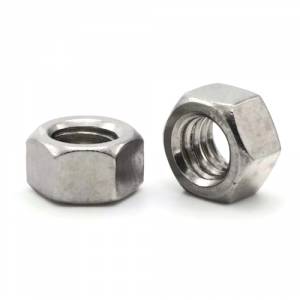
- M12 hex finish nut (or any large size) for base
- 3/4" hex finish nut (or any medium size) for midsection
- 5/16" hex finish nut (or any small size) for the head
Hat Options:
- M6 flange nut
- Alternative: 1/4"-20 black oxide stainless steel hex finish nut with matching 1/4" black oxide stainless steel flat washer
Additional Materials:
- 1/8" red and 3/8" green satin ribbons
- Gorilla Glue
Step-by-Step Instructions
Step 1:
Select Your Nuts
Select 3 decreasing albanycountyfasteners.com stainless steel nuts. Ensure proper fit when stacked.
Step 2:
Assemble Body
Assemble body by gluing nuts (largest to smallest). Use Gorilla glue (2 hr cure time).
Step 3:
Prepare Hat
Choose a flange nut (or black oxide nut and washer for hat).
Step 4:
Add Ribbon
Thread 6-inch ribbon through the top "head" nut.
Step 5: Thread Hat
Thread ribbon ends through the "hat" nut hole.
Step 6: Position Hat
Position hat centered atop head nut, pulling ribbon taut.
Step 7: Secure Ribbon
Knot ribbon tightly together above hat and trim.
Step 8: Embellish
Add any additional decorative elements using your craft supplies!
Creative Variations
Finishing Options: Experiement with different finishes like black oxide for a sophisticated look
Size Variations: Mix and match different nut sizes to create a family of snowmen
Ribbon Choices: Try different ribbon colors and patterns for variety
Display Ideas: Create multiple snowmen to make a charming winter scene