DIY Projects & Crafts with Fasteners
DIY Cotter Pin Angel Ornament
Watch How It's Made
Printable Instructions
Download PDF
DIY Cotter Pin Angel Printable
Safety First!
- Adult supervision required for using glue and adhesives
- Keep small parts away from children under 3
- Work in a well-ventilated area
- Wear gloves when handling glue
Materials Needed
Hardware:
- 3/16" x 2-1/2" Stainless Steel Cotter Pin (ACF SKU 060-184-0062)
- 1-1/2" External Retaining E "Snap" Ring (ACF SKU external 816128-0002 or internal 816056-0002)
- 1/4" Brass Finishing Cup Washer (ACF SKU 12322-0052 brass or ACF SKU 110042 stainless steel)
Decorative Materials:
- Gold ribbon
- Gems or rhinestones
- Gold, silver, or white glitter
- E6000 glue or Gorilla Glue
For the Skirt:
- Metallic or shimmer ribbon in ivory, gold, or rose gold (1/4" to 1/2" widths)
- Medium-width paintbrush for glue application
- Fine-tip glue applicator for precise placement
Step-by-Step Instructions
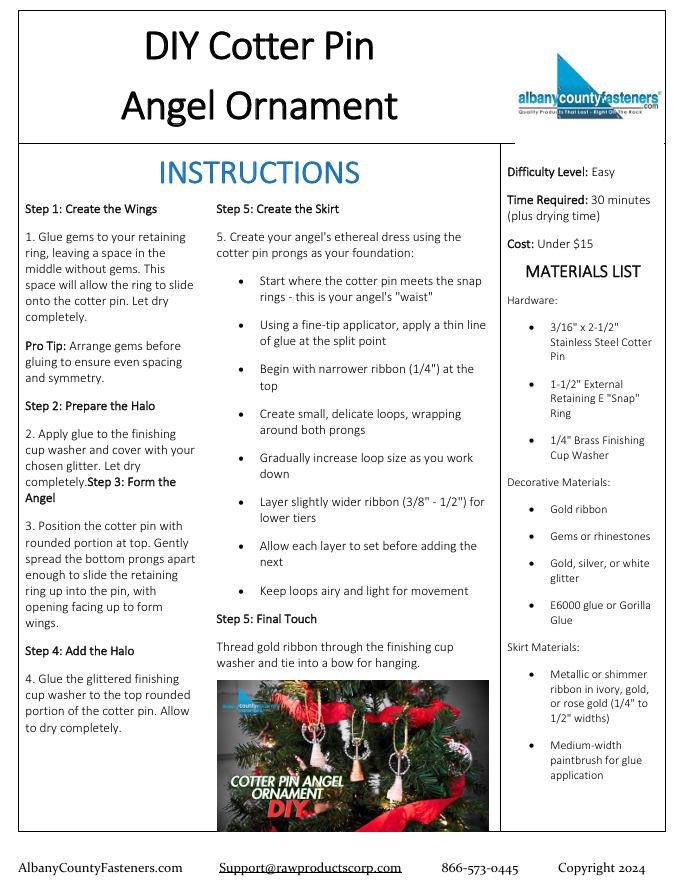
Step 1: Create the Wings
Glue gems to your retaining ring, leaving a space in the middle without gems. This space will allow the ring to slide onto the cotter pin. Let dry completely.
Pro Tip: Arrange gems before gluing to ensure even spacing and symmetry.
Step 2: Prepare the Halo
Apply glue to the finishing cup washer and cover with your chosen glitter. Let dry completely.
Step 3: Form the Angel
Position the cotter pin with rounded portion at top. Gently spread the bottom prongs apart enough to slide the retaining ring up into the pin, with opening facing up to form wings.
Step 4: Add the Halo
Glue the glittered finishing cup washer to the top rounded portion of the cotter pin. Allow to dry completely.
Step 5: Create the Skirt
Create your angel's ethereal dress using the cotter pin prongs as your foundation:
- Start where the cotter pin meets the snap rings - this is your angel's "waist"
- Using a fine-tip applicator, apply a thin line of glue at the split point
- Begin with narrower ribbon (1/4") at the top
- Create small, delicate loops, wrapping around both prongs
- Gradually increase loop size as you work down
- Layer slightly wider ribbon (3/8" - 1/2") for lower tiers
- Allow each layer to set before adding the next
- Keep loops airy and light for movement
Pro Tips for Perfect Skirts:
- Less is more - don't oversaturate with glue
- Metallic ribbons catch light beautifully on the tree
- Alternate ribbon textures for added dimension
- Let skirt move freely - avoid over-gluing
- Create asymmetrical loops for natural movement
Step 6: Final Touch
Thread gold ribbon through the finishing cup washer and tie into a bow for hanging.
Creative Variations
Color Themes:
- Traditional: Gold and Silver
- Modern: Rose gold and White
- Celestial: Blue and Silver
Wing Variations:
- Add smaller gems between larger ones
- Use pearls instead of gems
- Greate patterns with different sized gems
- Try glitter instead of gems
Ribbon Options:
- White for a traditional angel look
- Silver for a modern style
- Multiple thing ribbons twisted together
- Lace ribbon for a vintage appeal
Pro Tips:
- Protect your work surface with newspaper when working with glue or glitter
- Use tweezers to place small gems precisely
- Heat glue gun tip can help remove stray glitter strands
- Make several angels at once while supplies are out
- Create a family of angels using different sized cotter pins